
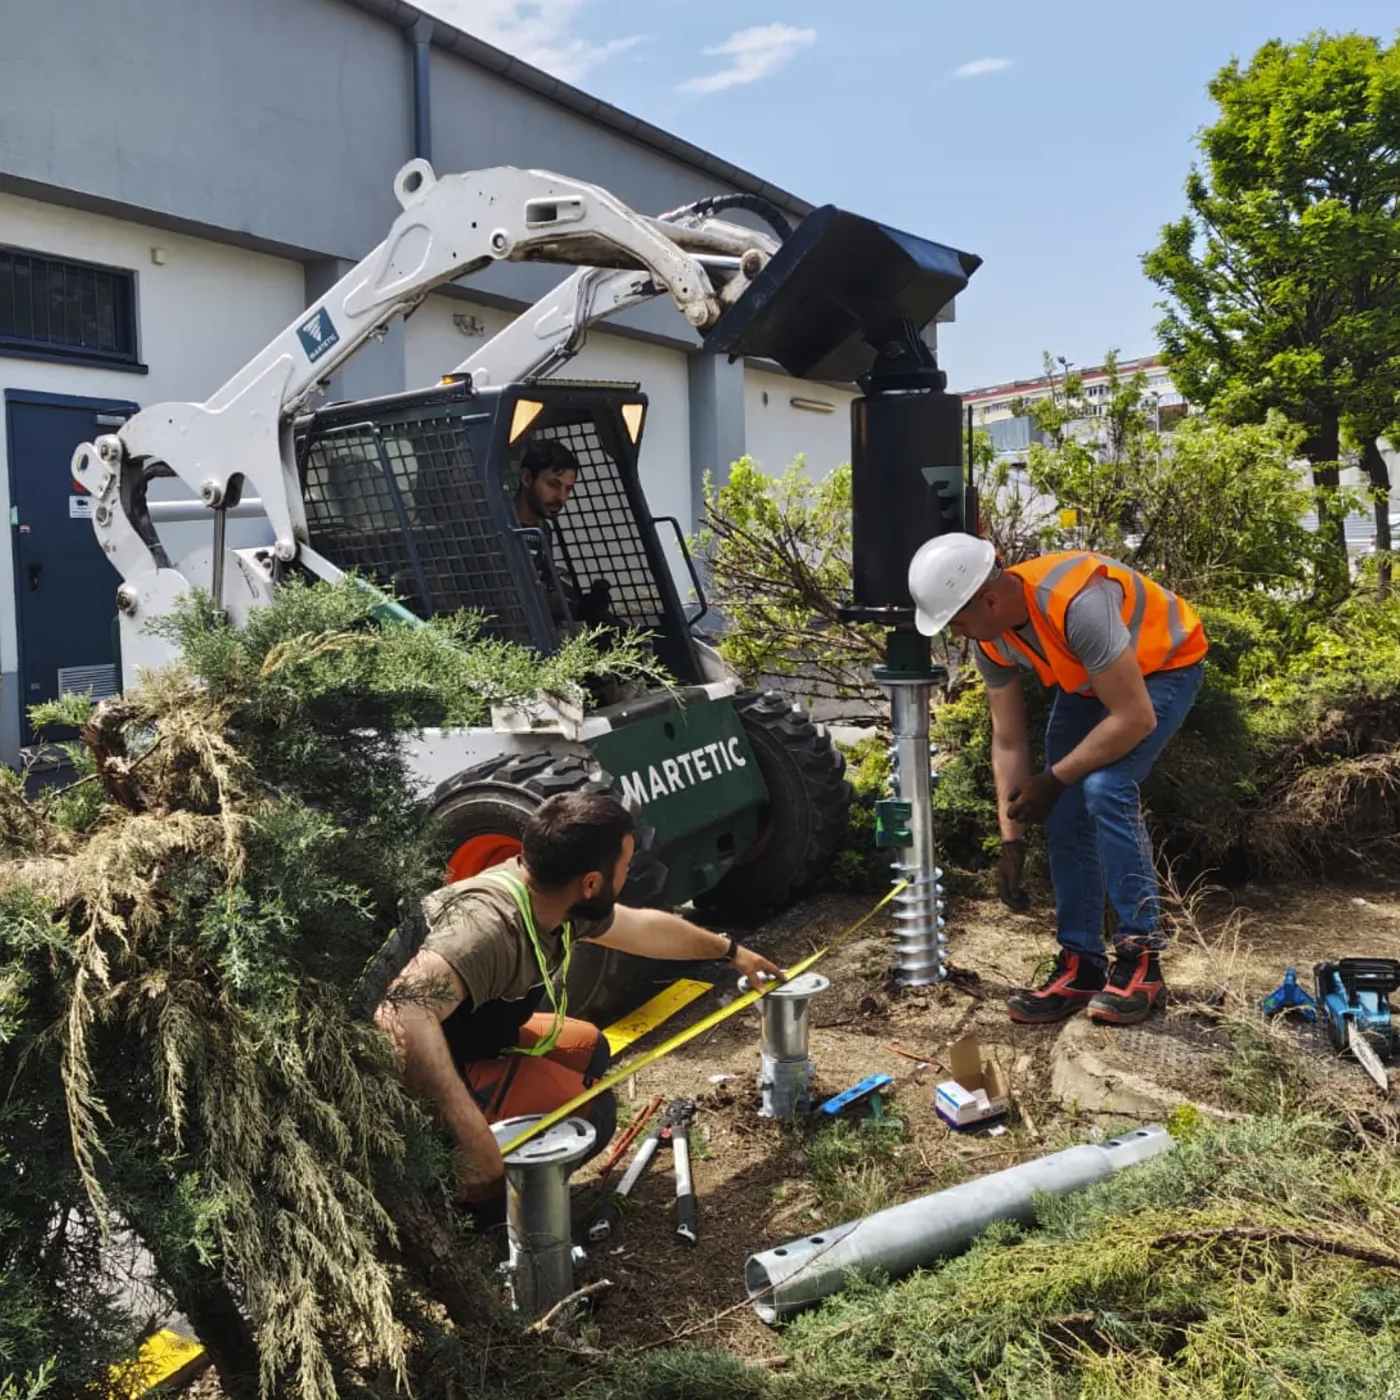
Installing a foundation screw looks simple when you see it in a video: the machine positions the screw, it starts to rotate and goes into the ground.
In reality, screwing in is only the visible part of the work.
A correct installation starts before the machine reaches the site: with the building plan, the position of the points, the information about the ground, the levels, the access and the checking of utilities. During installation the position, verticality, depth and the behaviour of the machine must be controlled, and at the end the whole grid must be checked before the structure is placed on the foundation.
Foundation screws are installed mechanically, by controlled rotation, at the points set for the structure.
The process has a few clear stages:
Speed is not the main criterion.
A screw installed quickly, but in a different position, at a different level or with a deviation that the structure cannot take up, is not a good installation.
1. Installation starts with the plan, not with the machine
Before scheduling installation we must know where each point has to end up and what role it plays in the building.
For a simple terrace the information can be relatively little.
For a modular house, a converted container, or an LSF, Timber Frame or HEA structure, we need a much clearer picture of the structure.
Depending on the project, the following are useful: the foundation or chassis plan, the position of the beams and load-bearing walls, the dimensions, the loads available, the geotechnical study, the topographic survey, the access and the information about underground networks.
We can also make a preliminary estimate from a sketch and a few photographs.
But an estimate must not be confused with an execution plan.
2. Setting out the foundation screws
2. Setting out the foundation screws
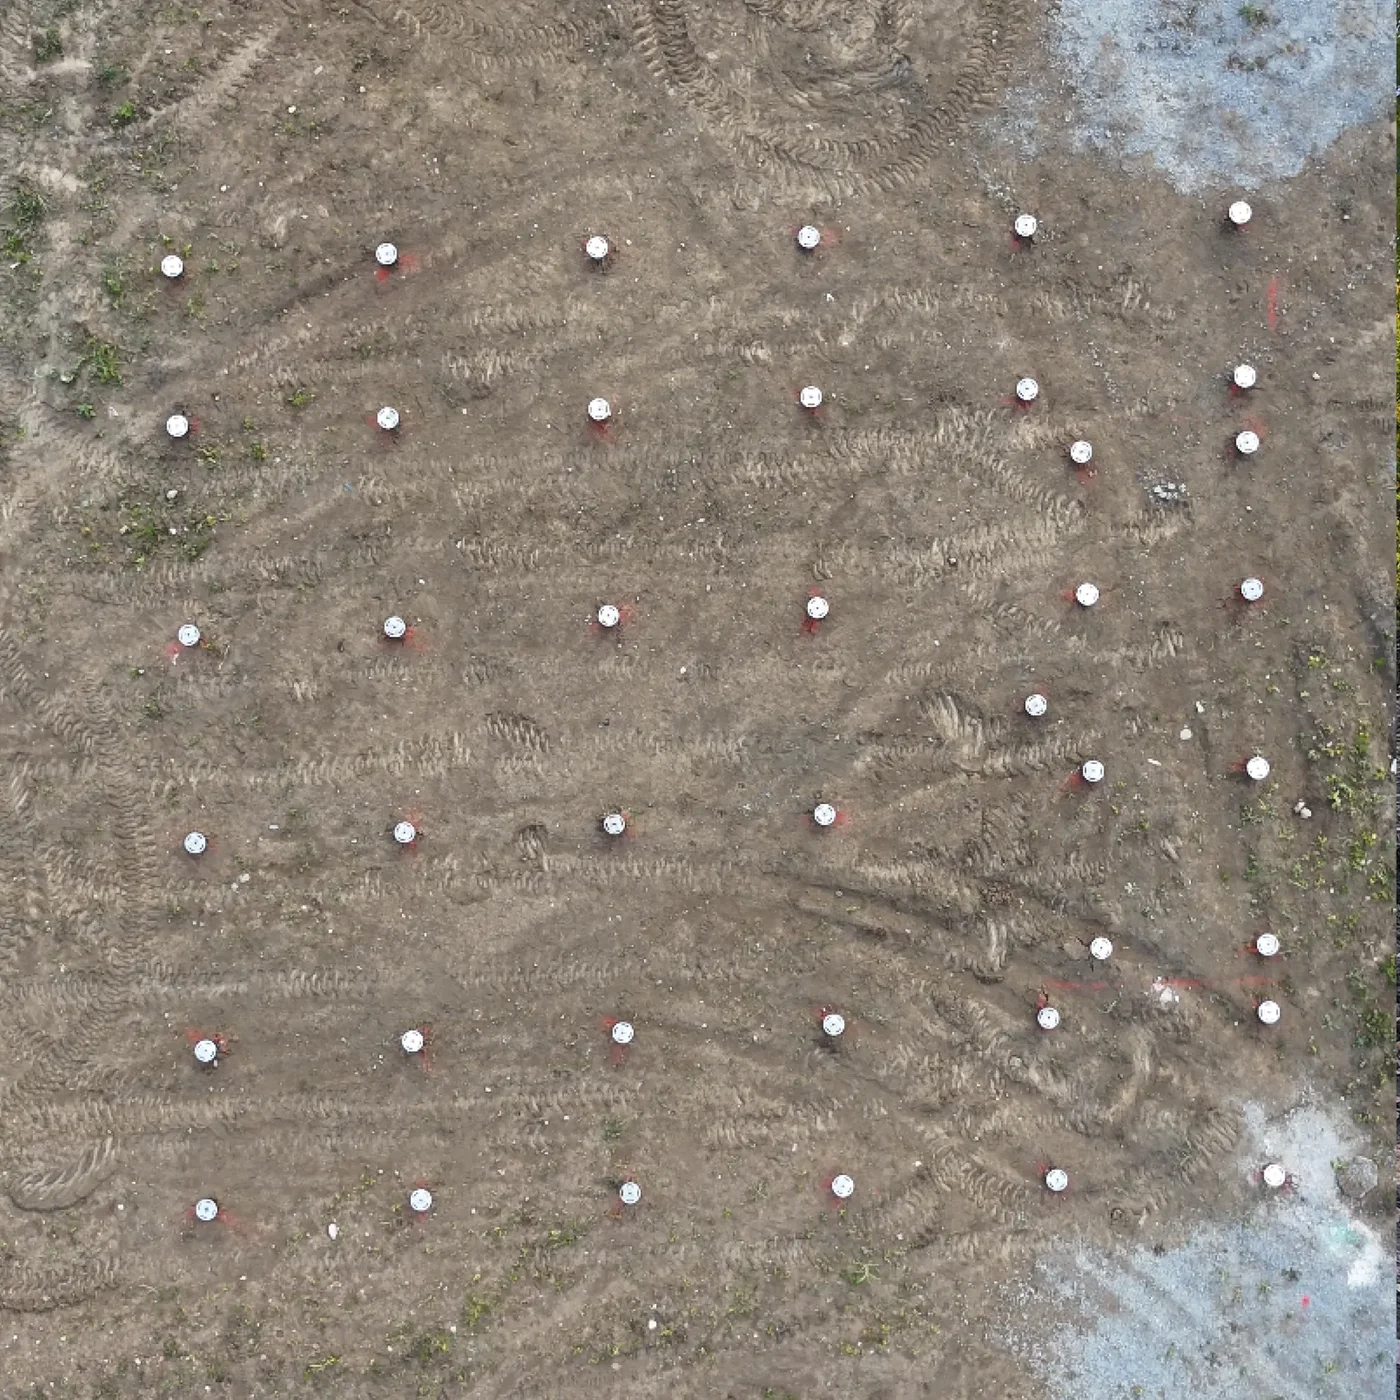
Setting-out links the drawing to the site.
First the level reference and the position of the building are set. Then the axes, corners and intermediate points are marked.
For a rectangular building, the dimensions and the diagonals are checked.
For a modular house or a steel structure, the points must be correlated with:
- the beams
- the load-bearing walls
- the longitudinal members
- the joints between modules
- the posts
- the positions with concentrated loads.
Ideally each point gets a number or code that is used both in the plan, during installation and in the final documents.
Why is setting-out so important?
Because a foundation screw must not simply be installed “under the building”.
There must be a clear load path:
For example, in a container we do not install an intermediate point under the mere floor sheet if that area is not designed to receive a support.
3. Checking utilities before screwing in
3. Checking utilities before screwing in
It is one of the most important stages.
The screw goes into the ground to depth and can intersect:
- electrical cables
- water pipes
- sewerage
- drains
- gas pipes
- existing foundations
- tanks
- other buried installations.
The available plans must be analysed, and the known routes must be marked before installation.
Depending on the site, electromagnetic detectors, ground-penetrating radar, local trial pits or other checking methods can be used.
It is important, however, that no method on its own guarantees the identification of all underground installations.
If there is uncertainty in a critical area, the solution is not to screw in and see what happens.
The point must be checked or, if repositioning is necessary, it must be correlated with the structure.
4. The screw is chosen before installation
4. The screw is chosen before installation
The model must not be chosen on site simply on the principle:
The diameter, thickness, length, thread, flange and connection must be correlated with the structure and with the available information about the ground.
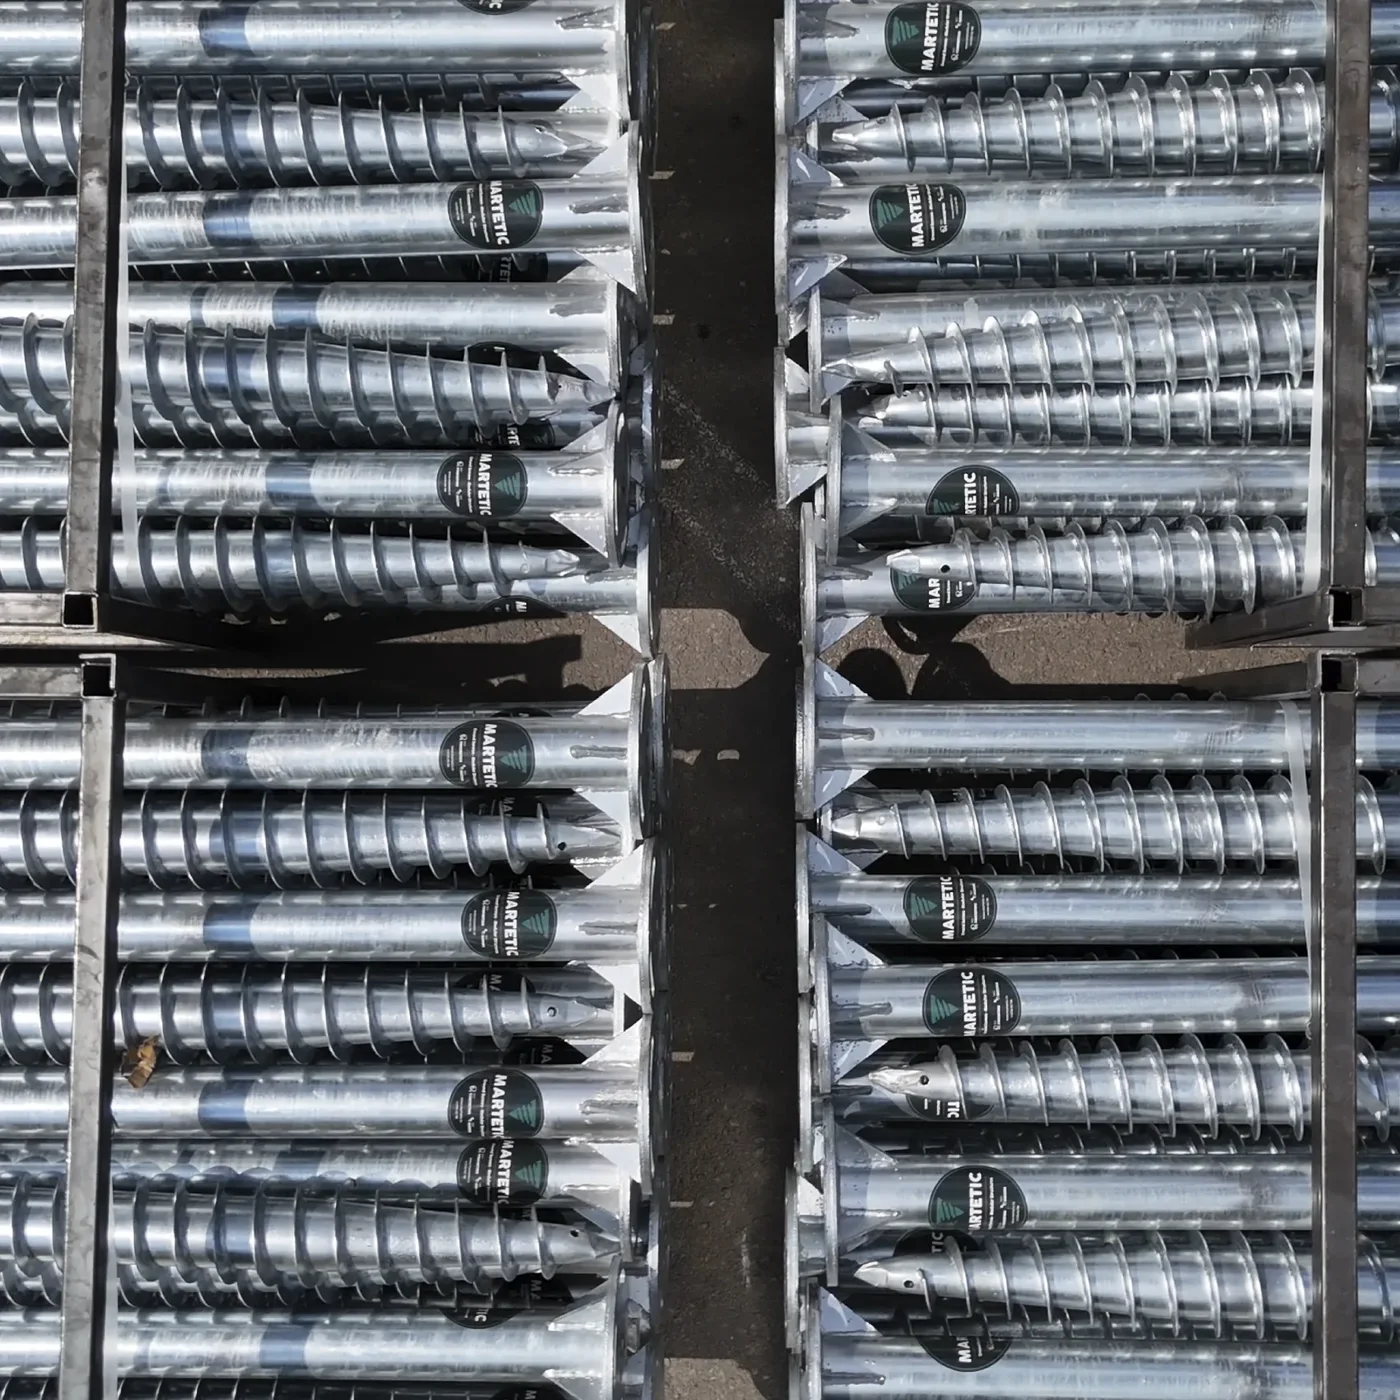
MARTETIC works with several product families:
| Range | Indicative use |
|---|---|
| G76 / G89 | fences, posts, gates and vertical elements |
| M76 | terraces, decks, pergolas and lightweight structures |
| M89 | containers, modular houses, LSF, Timber Frame and platforms |
| M114 / M140 | higher loads, per project |
| V76 / V89 / V114 | modular systems for additional depths |
| Custom | flanges, heads and connections adapted to the project |
The table is indicative.
The fact that the M89 is frequently used for modular houses and containers does not mean that every such building must automatically be installed on M89.
The product is chosen for the building and the ground. The machine is chosen for the product and the site.
5. What machinery is used to install foundation screws?
5. What machinery is used to install foundation screws?
Professional installation is mechanised.
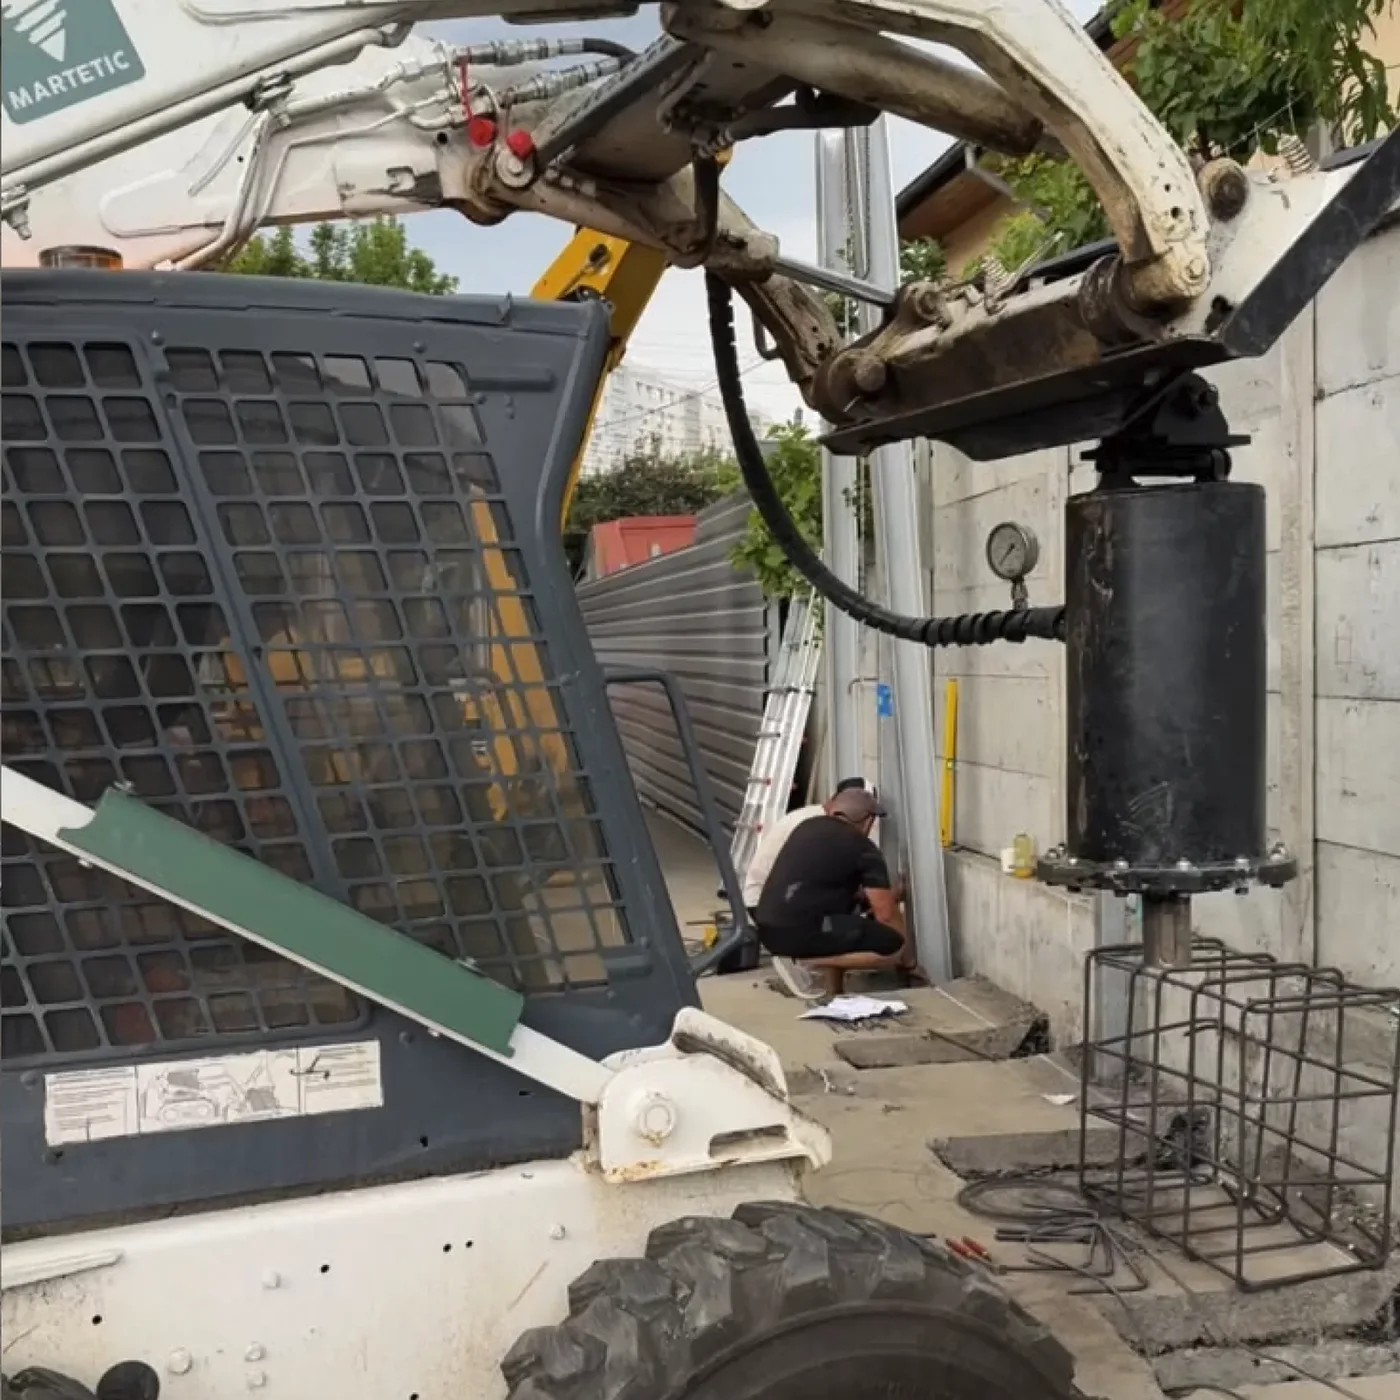
Hydraulic or electric screwing heads can be used, mounted on compatible machines or on dedicated equipment.
In MARTETIC works we mainly use mechanised equipment adapted to the size of the screws and the access conditions.
A compact machine can be very efficient for jobs with many points and enough manoeuvring space. A mini excavator can be useful in certain areas where the geometry of the arm gives better access.
The choice is not made only by the physical size of the machine, however.
What matters:
the length of the screw, the power required, the stability of the machine, the manoeuvring space and the ability to take the reaction produced during rotation.
For a long screw we also need enough working height.
A machine can get through the gate and still not be able to work properly next to a fence, a building or under overhead cables.
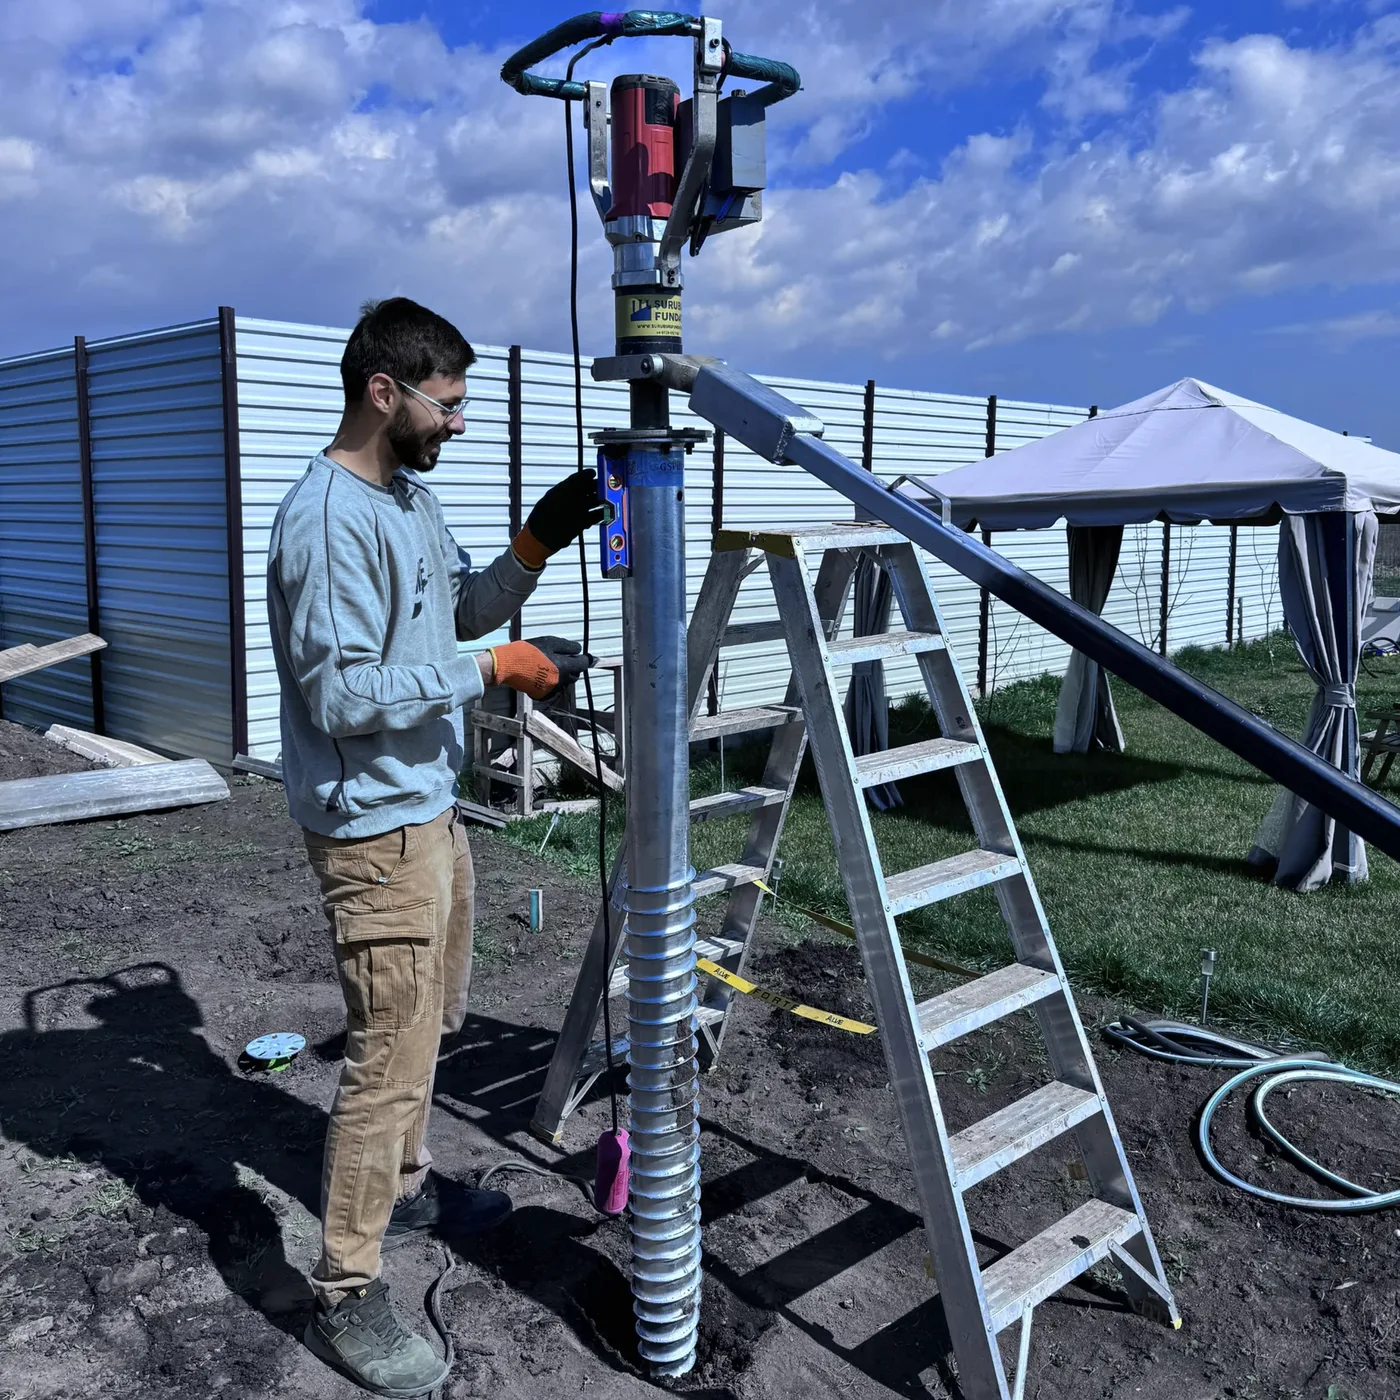
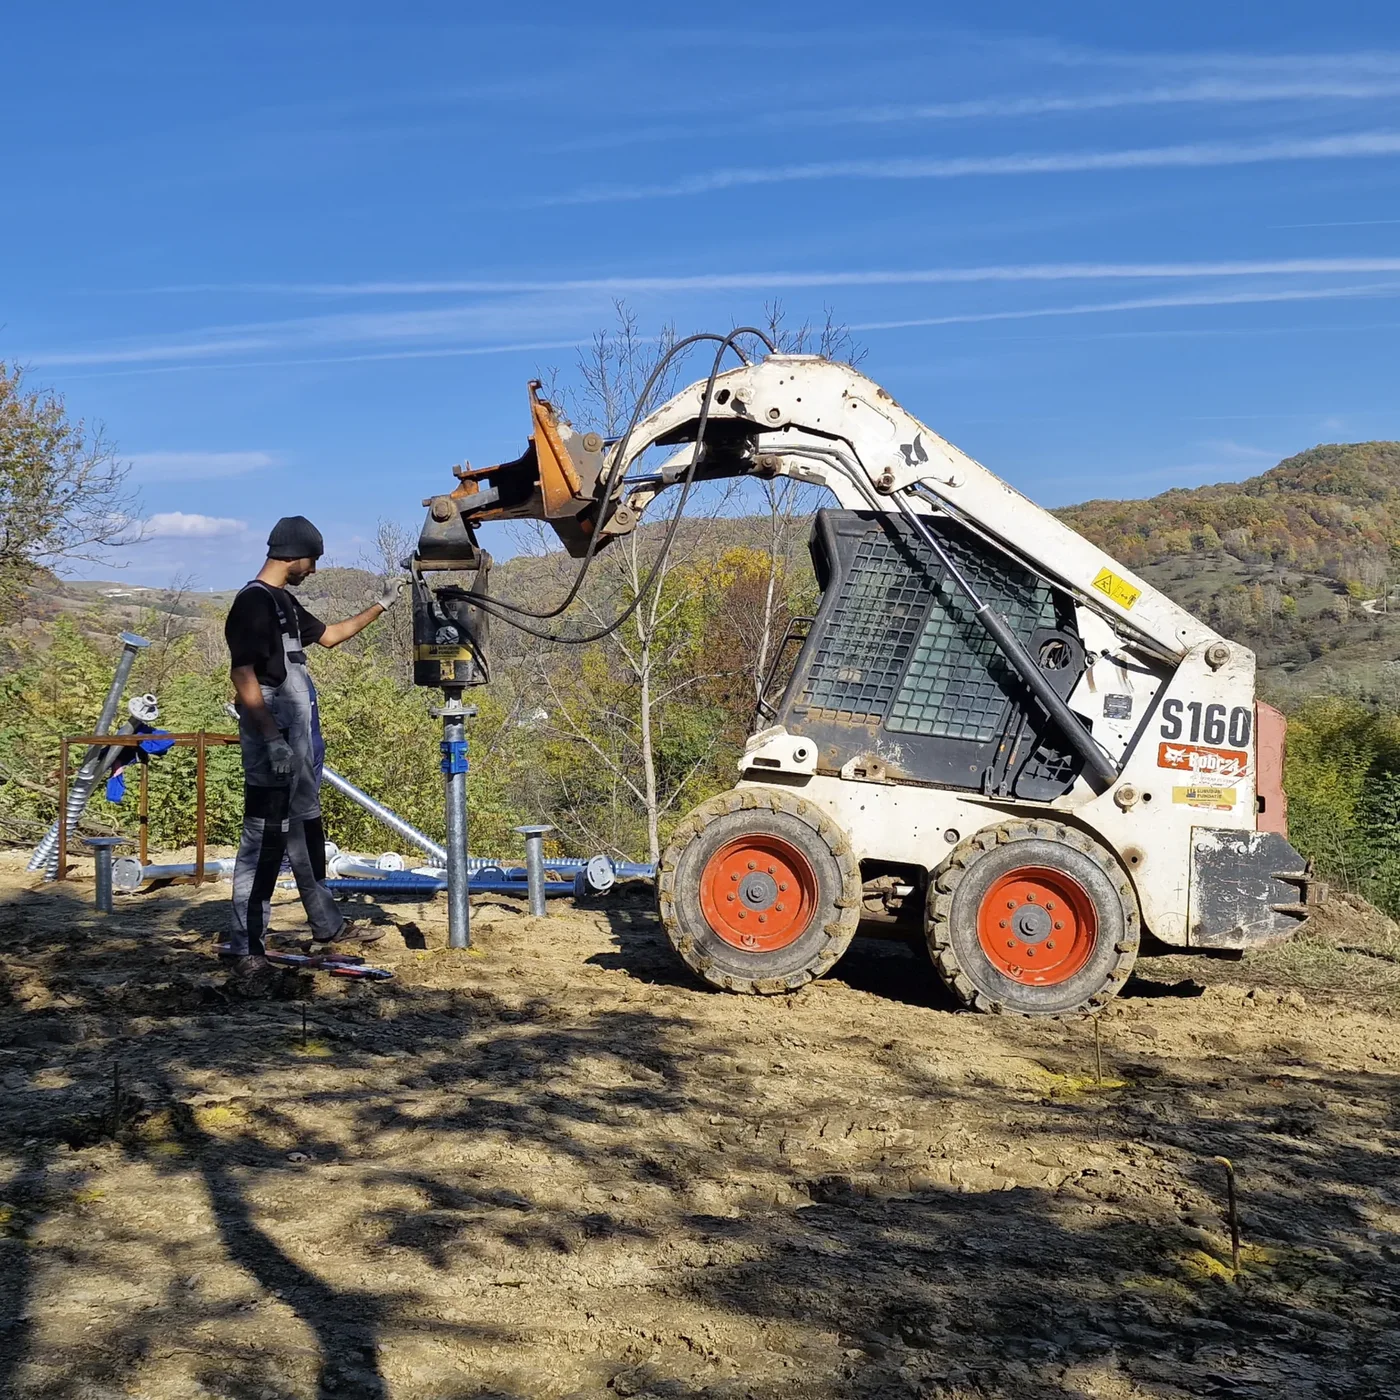
6. Hydraulic pressure is not the same as torque
6. Hydraulic pressure is not the same as torque
It is an important technical difference.
In a hydraulic system, the pressure gauge shows the pressure in the circuit.
To turn this pressure into a torque value, there must be a known relationship for the screwing head concerned and the working conditions.
The efficiency of the system, the temperature, wear, flow rate and the configuration of the installation can influence the relationship between pressure and torque.
Therefore, it is not correct to say we have measured the torque just because we read the pressure from the gauge.
Likewise, an electric machine without a sensor and recording system can carry out the installation, but cannot automatically document a numerical torque.
And one more important thing:
A high resistance met during screwing does not automatically mean a high load-bearing capacity.
It can be dense ground.
But it can also be:
a stone, a piece of concrete or a local obstacle.
The capacity of the foundation is determined by analysing the assembly and, when necessary, by testing.
7. Preparing the access
7. Preparing the access
Before mobilisation, it must be checked whether the machine can actually reach each point, not just whether it can enter the property.
What matters:
- the width of the gate
- the available height
- the slope
- mud or fill
- kerbs and slabs
- vegetation
- overhead cables
- the position of buildings
- the space needed by the equipment
- the unloading area.
A 1.8 metre gate access, for example, does not automatically guarantee that a 2-metre screw can be lifted and installed at any point on the site.
The screw foundation can greatly reduce digging, but that does not mean the site never needs preparation.
In certain projects, local stripping, geotextile, gravel, drainage or preparation of access routes may be needed.
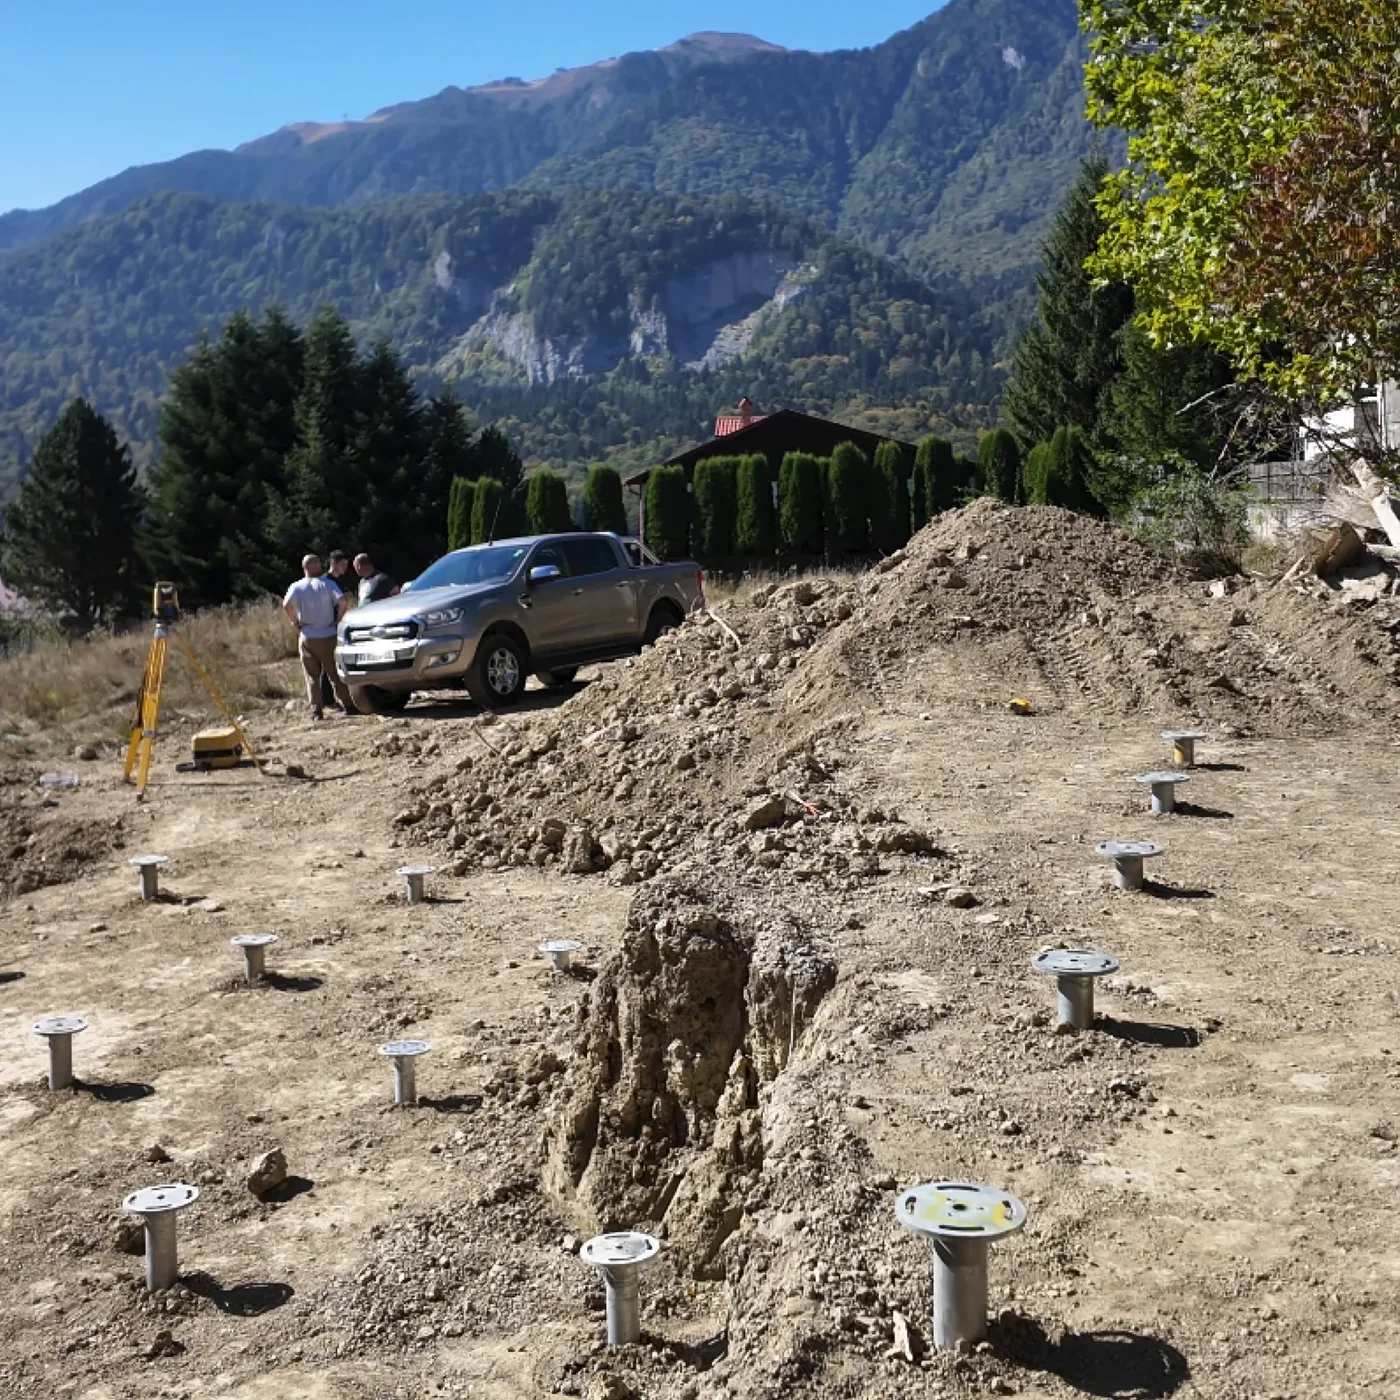
8. The first screw is important
8. The first screw is important
The first point gives the team practical information about:
- the positioning of the machine
- access
- the behaviour of the ground
- rotation speed
- feed
- verticality
- the available parameters of the machine.
But the first screw is not a geotechnical study, nor does it guarantee that all the other points will meet the same ground.
Especially in fill, two positions only a few metres apart can behave differently.
If from the very first point a repeatable problem appears — a layer that cannot be crossed, insufficient depth or a conflict with the machine — it is better to clarify the situation before continuing the whole grid.
9. How does screwing in actually begin?
9. How does screwing in actually begin?
The screw is brought to the set-out position, and the tip is placed at the set point.
The axis is checked and rotation begins.
The first rotations are very important.
If the screw starts out tilted and the deviation is not corrected early, the difference at the flange can become significant.
Verticality is monitored in two roughly perpendicular directions.
Corrections are made progressively:
rotation is stopped, the position of the head or the guiding is corrected, then it continues slowly and is checked again.
If the screw keeps deviating, the reason must be understood.
There may be an obstacle.
What we do not do?
We do not wait for the screw to reach its final depth and then pull the flange sideways to “straighten” it.
Verticality is controlled during installation, not repaired by force at the end.
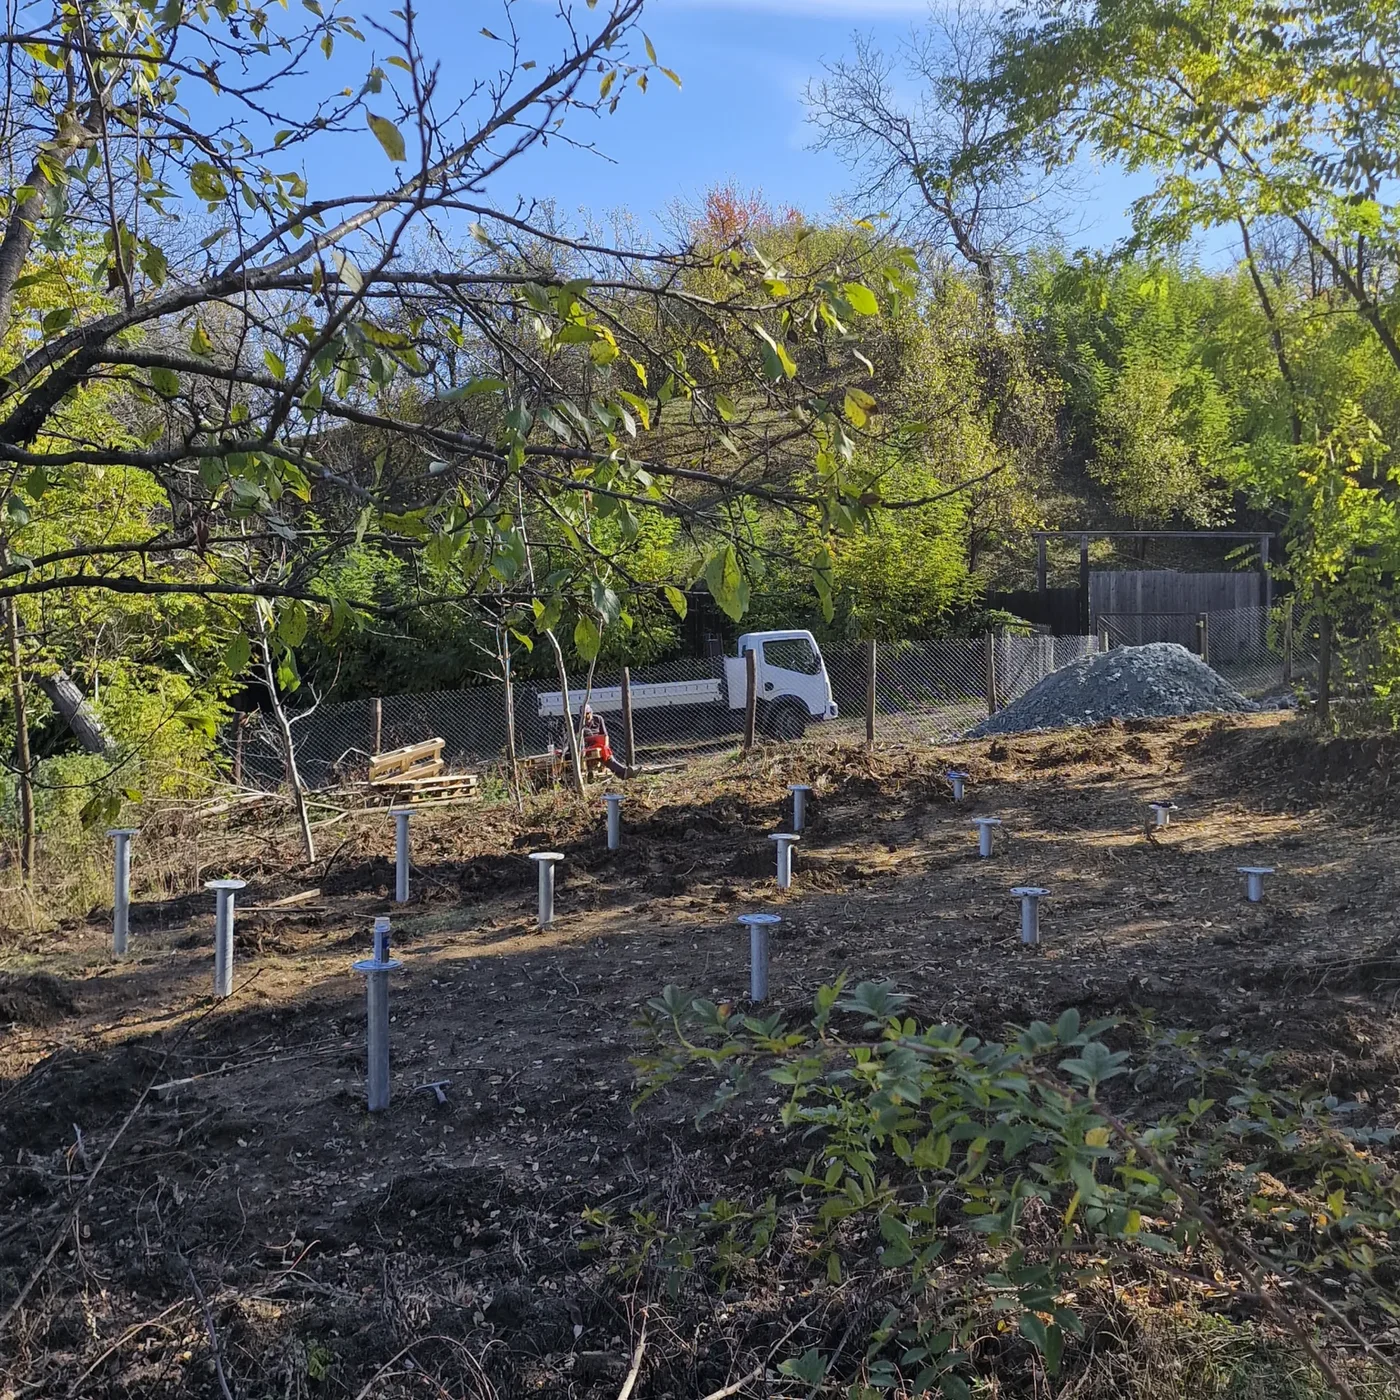
10. How is the depth determined?
MARTETIC installation on video
The two videos referred to in the article can be watched directly below. In the local HTML version, the player loads only after a click; on the site it is served normally over HTTPS.
10. How is the depth determined?
The depth is not chosen only by the length of the product.
The following must be correlated:
With a one-piece screw from the M range, the flange is fixed. Therefore, the depth at which we stop screwing directly affects the final level of the support.
With the V systems, the extensions offer greater depth flexibility, but each joint must be installed and checked.
It is not correct to stop a screw much too high just because we have reached the desired level, if the depth is not justified.
Likewise, it is not correct to continue by force just to reach a preset level if the machine, the product or the ground show that the situation must be reassessed.
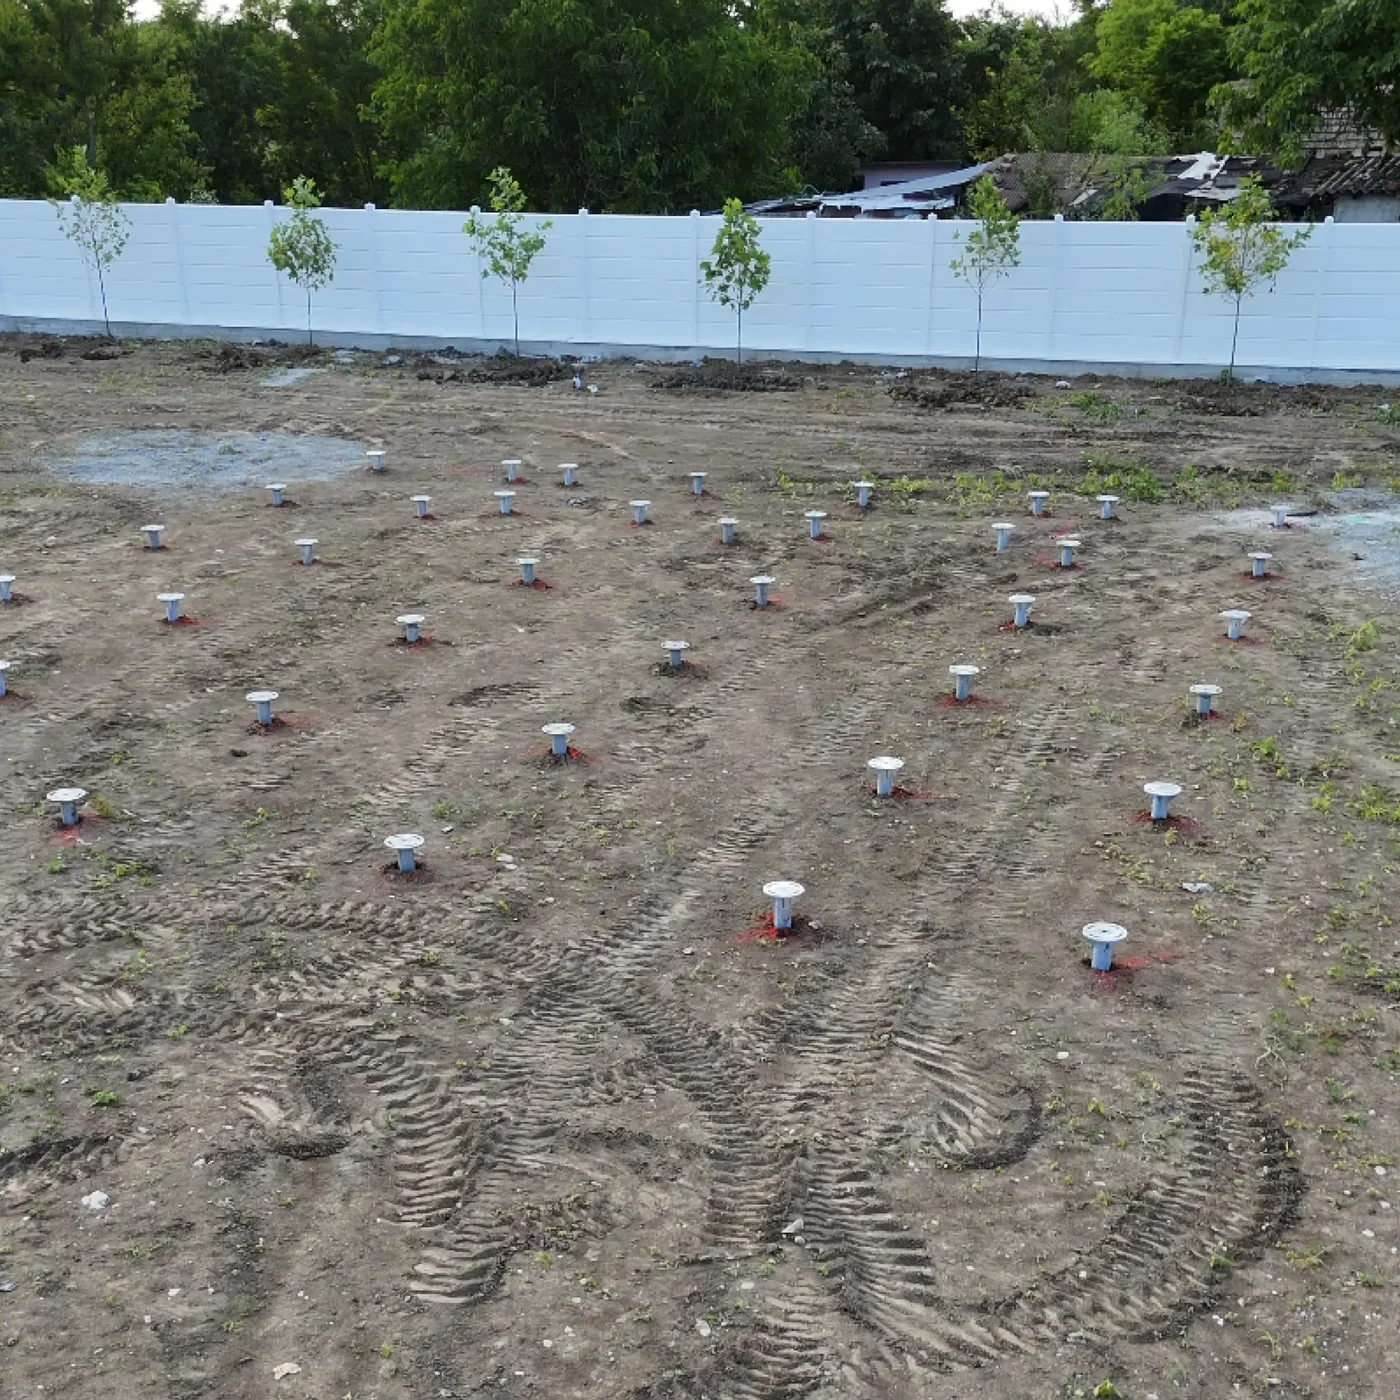
11. How do we get all the flanges to the same level?
11. How do we get all the flanges to the same level?
A stable level reference is used throughout installation.
The level of the points is checked with measuring instruments, including a laser, and the order of execution is planned so that differences can be controlled.
After the grid is installed, the following are checked:
| Check | What it looks for |
|---|---|
| Position of the points | relation to the axes |
| Diagonals | the geometry of the building |
| Levels | height relative to the reference |
| Flatness | compatibility with the structure |
| Orientation of the flanges | compatibility of the holes and connections |
| Distances | space for beams and installation |
For prefabricated buildings, containers or steel structures with holes already made in the factory, precision becomes very important.
A difference that seems small in the ground can become a problem when the building's chassis arrives on site.
12. What tolerances does installation have?
12. What tolerances does installation have?
There is no single universal tolerance for all projects.
A fence does not have the same positioning requirements as a steel module made in a factory with fixed holes.
Tolerances must be set in the project or in the work documents.
For certain standard MARTETIC installations, values such as the following can be used as indicative contractual benchmarks:
These must not be turned into a universal tolerance for any structure.
13. How is the building connected to the foundation screws?
13. How is the building connected to the foundation screws?
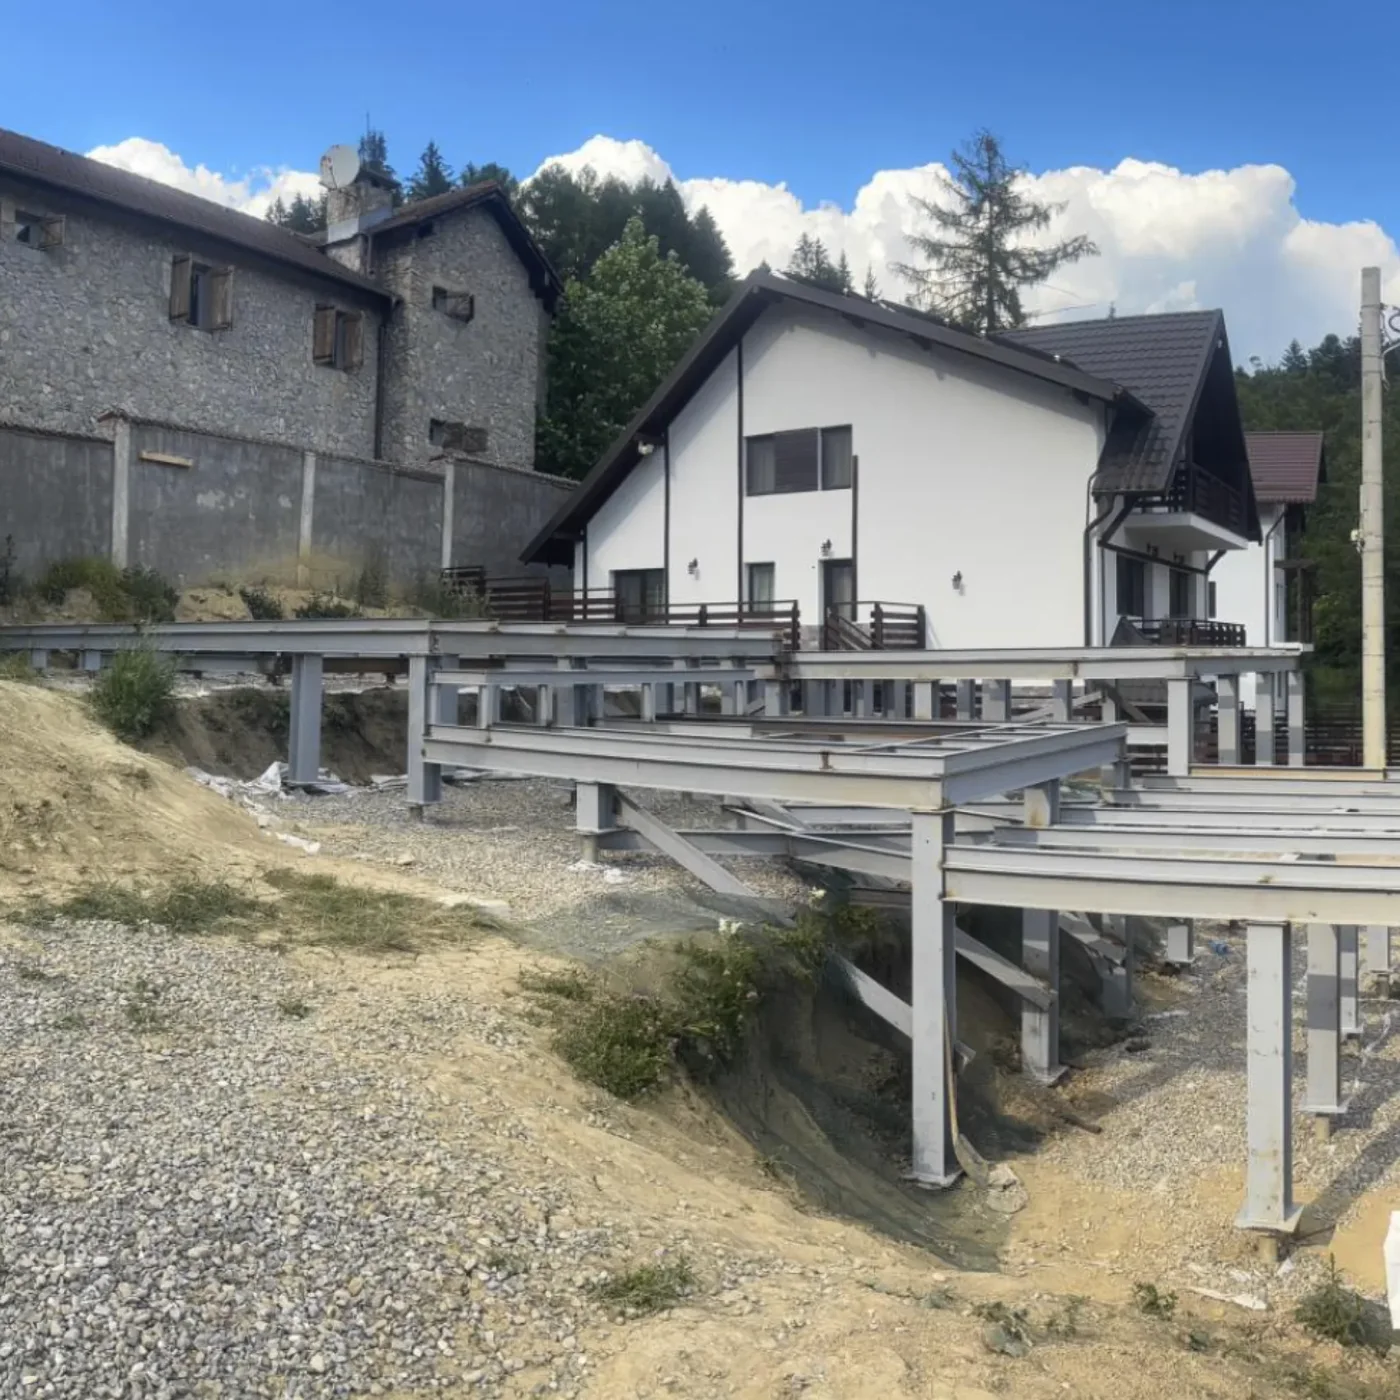
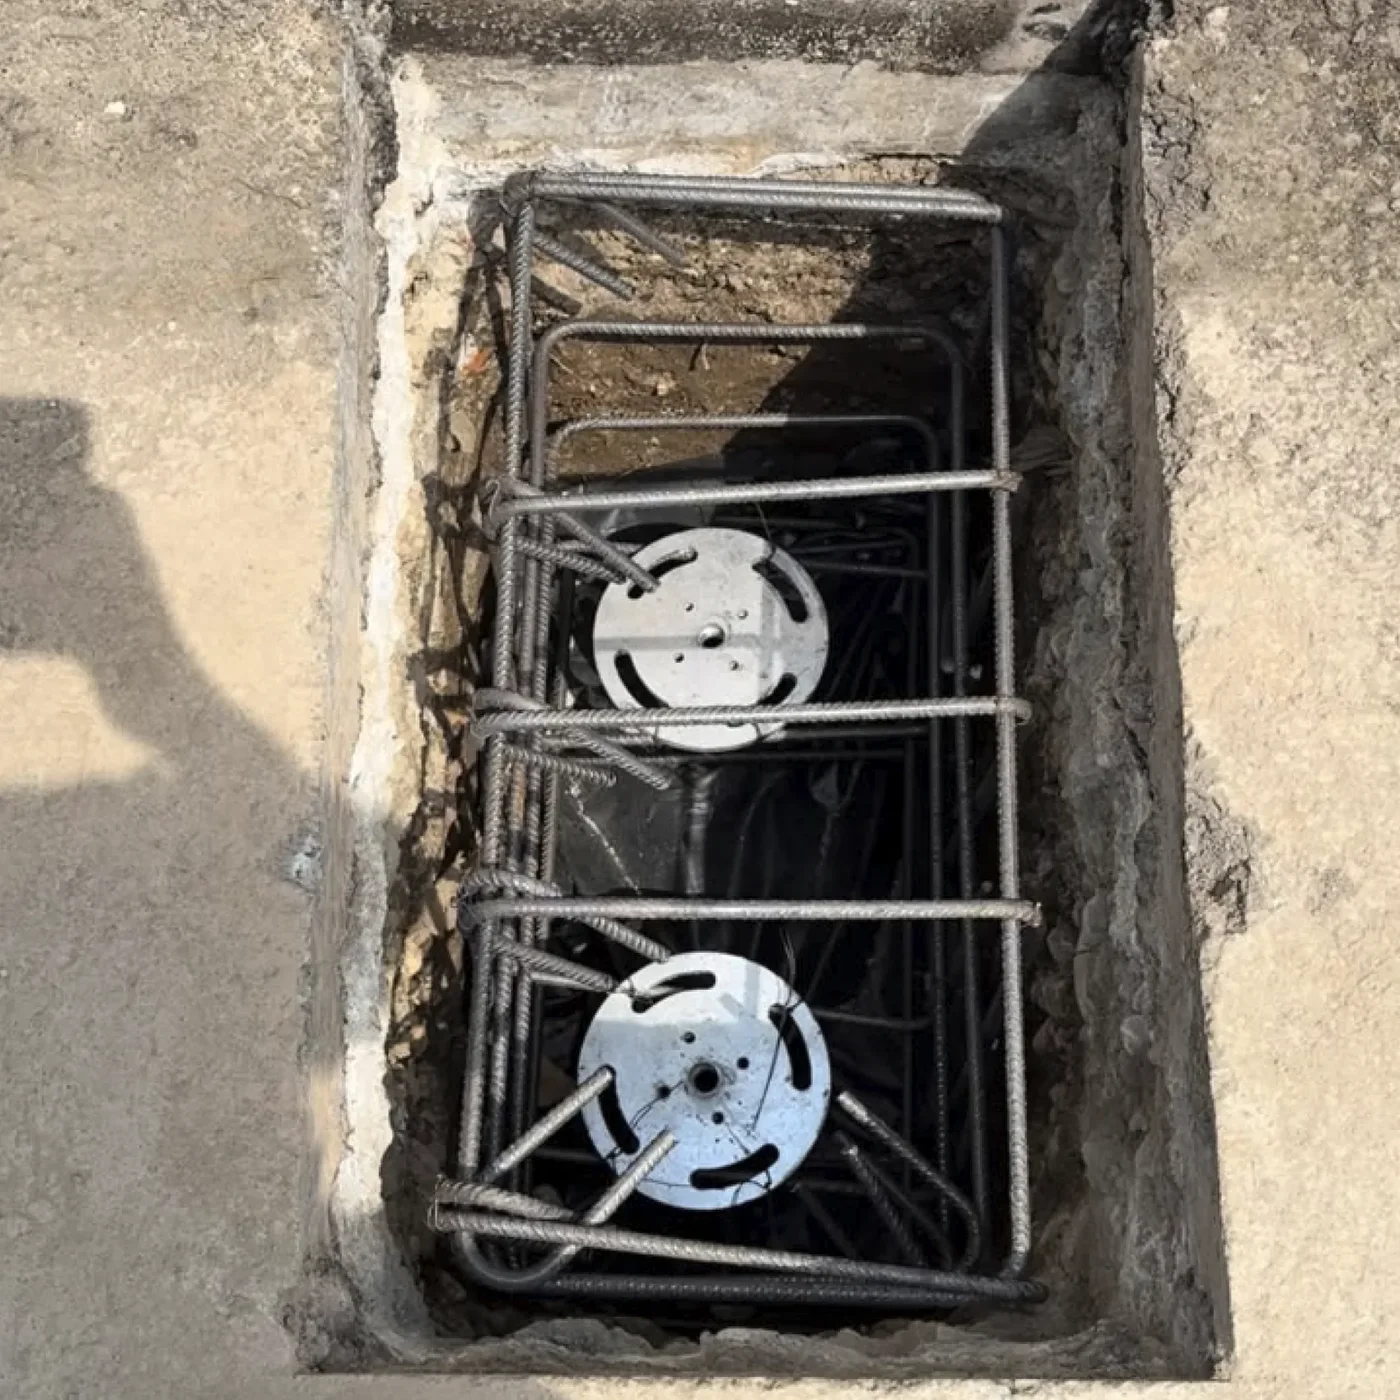
The foundation does not end at the flange.
The building's load must reach the screw correctly.
Depending on the structure, the connection can be made through:
| Structure | Examples of connections |
|---|---|
| Timber Frame / timber | plate, sole plate or base beam |
| LSF | C/U chassis or adapter plate |
| Container | corner casting, longitudinal member or reinforced frame |
| HEA / IPE | flange or base plate |
| Post | dedicated head, flange or Custom part |
Sometimes we use adapter plates or Custom parts to create an exact connection between the foundation and the structure.
But an adapter must not be used to hide any installation deviation.
The principle is very simple:
A good screw, installed correctly, but badly connected to the structure, does not make a good foundation.
14. Can you pre-drill before installation?
14. Can you pre-drill before installation?
Yes, in certain situations.
But pre-drilling should not be done automatically just so the screw goes in more easily.
A pilot hole can be useful for:
- guiding the tip
- a very compact surface layer
- an identified local obstacle
- a situation in which the position must be controlled very precisely.
At the same time, pre-drilling that is too large or too deep can change the contact between the screw and the ground and the behaviour of the foundation.
MARTETIC treats pre-drilling as an execution tool, not a universal solution for any difficult ground.
15. What do we do if we meet a stone or concrete?
15. What do we do if we meet a stone or concrete?
We do not automatically force the installation.
If the resistance increases suddenly, we check:
the position, the verticality, the behaviour of the product and the area where we are working.
Depending on the situation, the following can be considered:
- extracting the screw
- a local trial pit
- controlled pre-drilling
- local removal of the obstacle
- repositioning
- another product
- a hybrid solution
- another foundation system.
Repositioning must not be done on the principle:
Those 30 cm can take the point out from under the beam and create an eccentricity that the structure was not designed to take.
16. How long does installing foundation screws take?
16. How long does installing foundation screws take?
It depends a great deal on the project.
For a small job, with good access and ground without obstacles, installation can be completed in a few hours.
For a modular house with dozens of points, sloping ground, variations in the ground or testing, the work can take one or more days.
The real time is not only the minutes in which the screw rotates.
It includes:
unloading, setting-out, positioning the machine, installation, measurements, any interventions and documentation.
Real MARTETIC examples
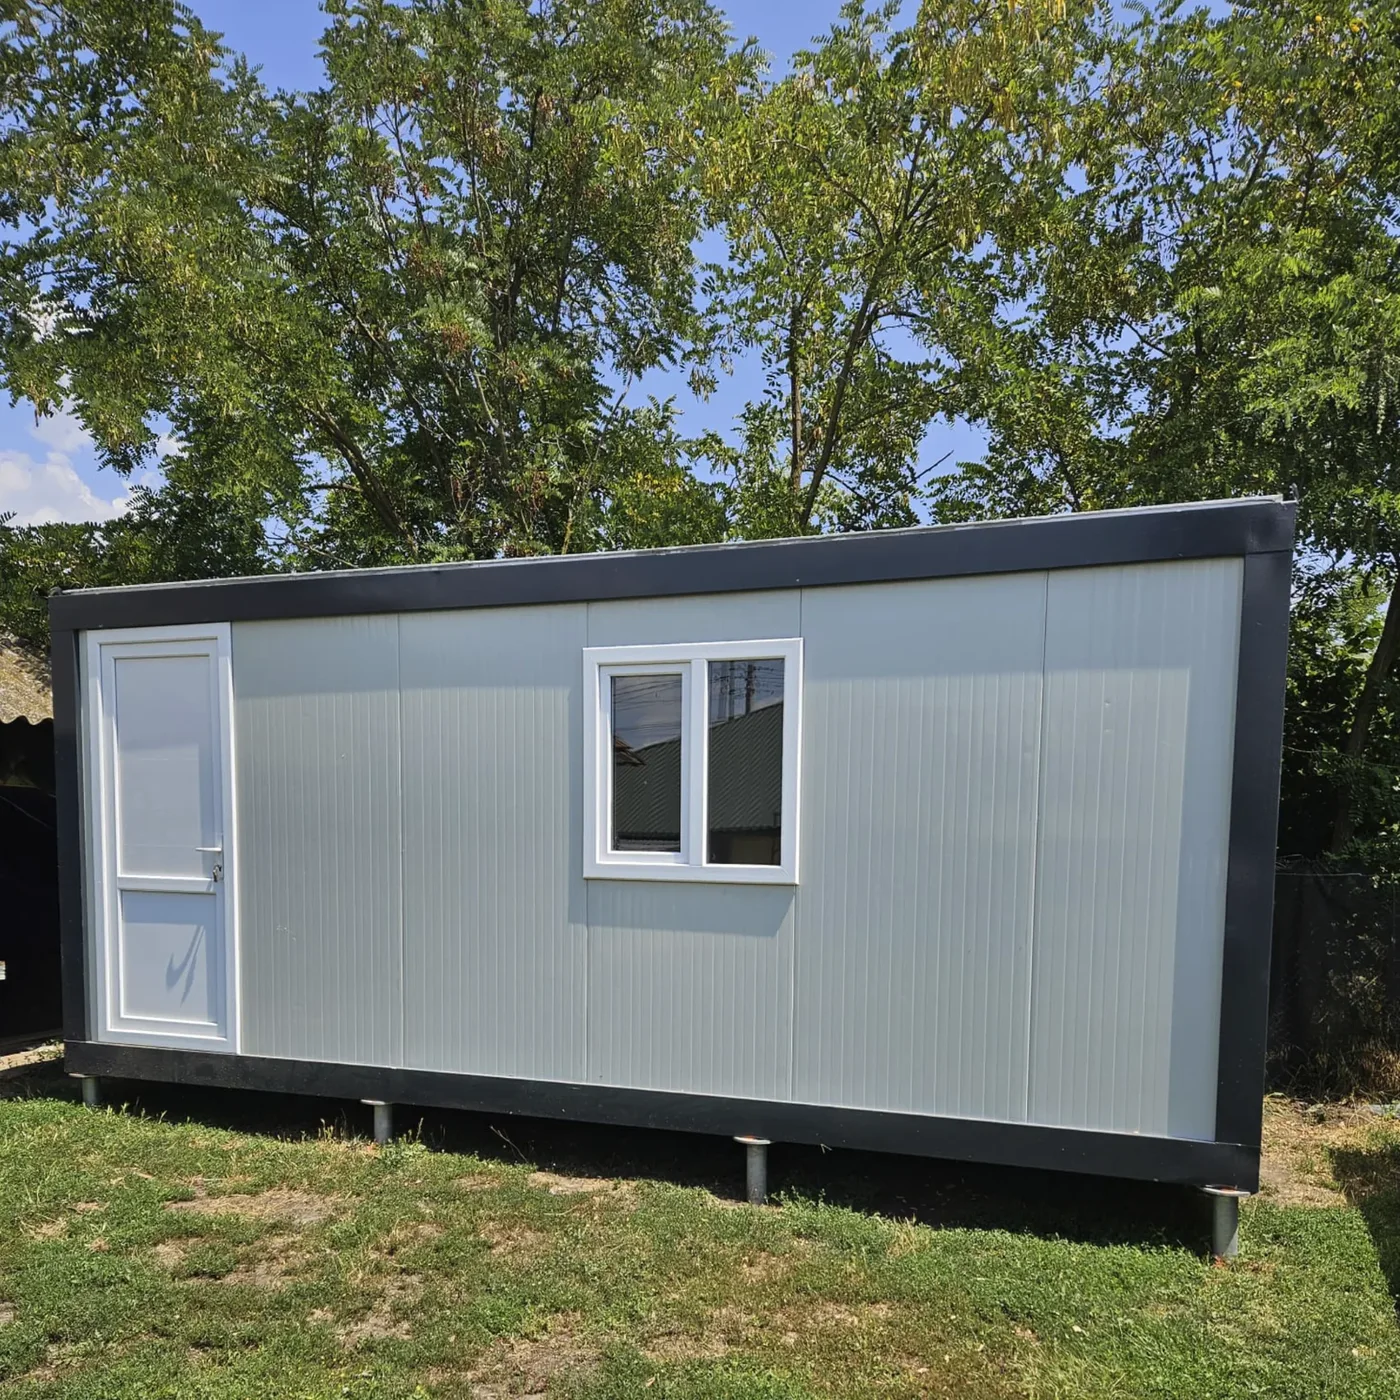
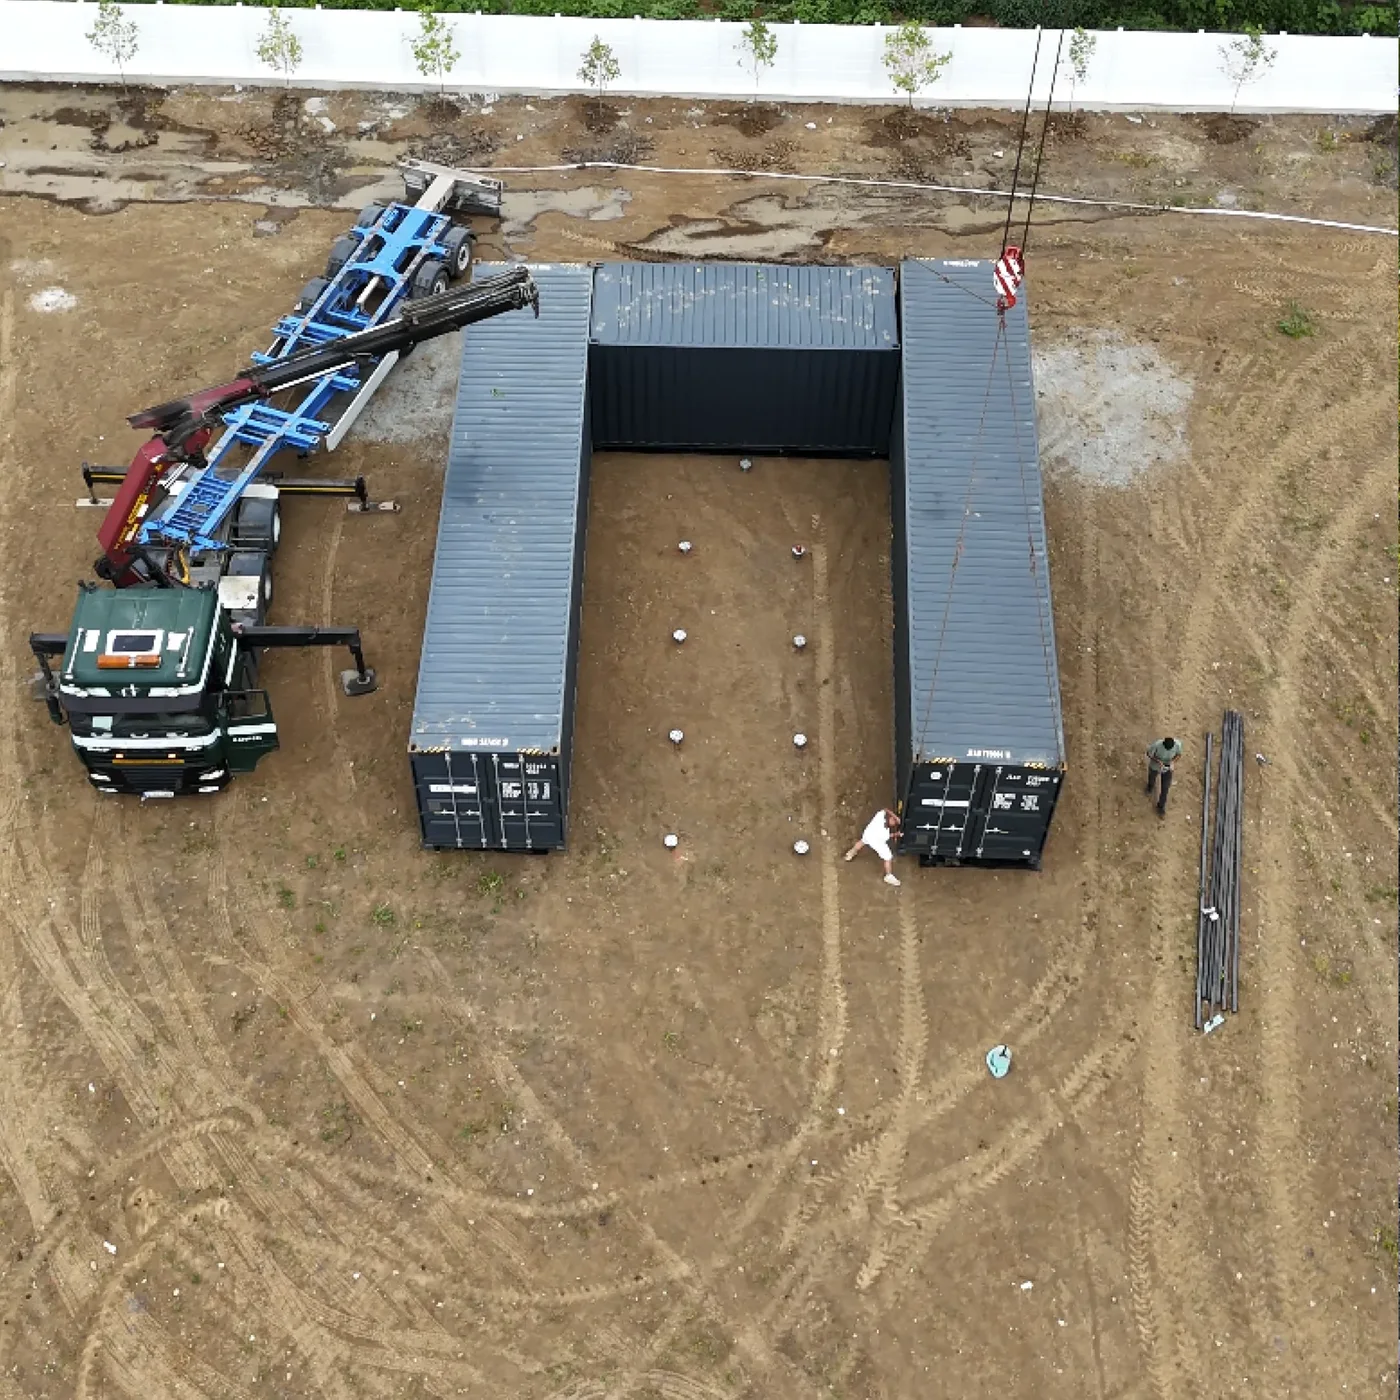
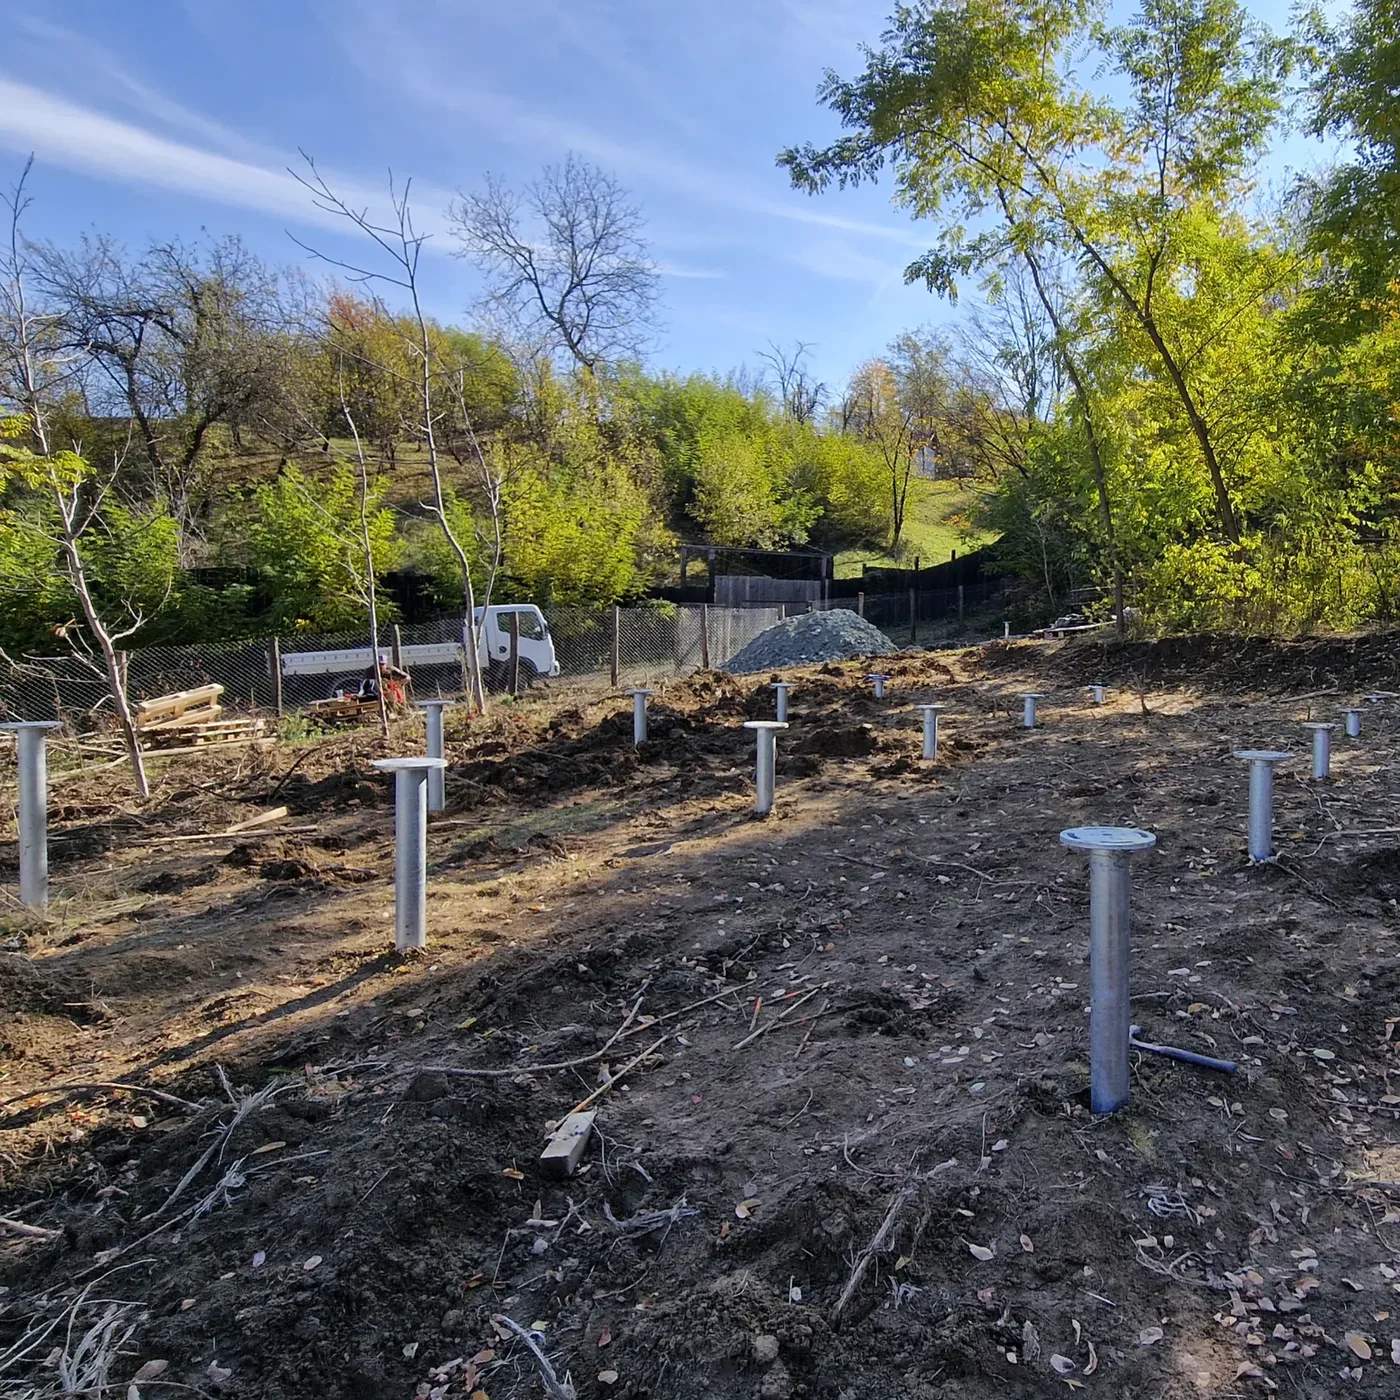
In Giurgiu, for a modular container, 15 foundation screws were installed, and the work was completed in about 4 hours, under the conditions of that project.
In the Provița area, for several modular buildings, about 100 points were completed in one intensive working day, with the products, setting-out and logistics prepared.
In Cernica, 44 M89 screws were installed for an assembly of containers.
These examples show the productivity possible in a well-organised project. They are not a promise of duration for another site.
17. When is the foundation ready?
17. When is the foundation ready?
Not at the moment the last screw has gone into the ground.
Before the structure is installed, the grid must be checked.
Depending on the project, we check:
- the position in plan
- the diagonals
- the levels
- the verticality
- the integrity of the products
- the orientation of the flanges
- the connections
- any deviations
- the documents
- testing, if provided for.
A point that does not meet the requirements must not be hidden under the building and forgotten.
The deviation is measured, documented, and it is determined whether it can be accepted, whether an adapted detail is needed or whether the point must be redone.
18. Are the screws tested after installation?
18. Are the screws tested after installation?
Not all works automatically require testing every point.
Depending on the project, static compression and/or uplift tests can be carried out.
Testing can be relevant when:
the project has significant loads, the ground is variable, there is fill, a design assumption must be confirmed or significant uplift loads appear.
The test follows the relationship between the applied load and the displacement of the tested point.
A test on a single point does not automatically mean that all points or all sites have the same capacity.
The result must be interpreted together with the product, the position, the depth and the ground conditions.
19. What documents can be handed over after installation?
19. What documents can be handed over after installation?
Depending on the product, the contract and the complexity of the project, the documentation can include:
- identification of the products
- the data sheets
- the applicable conformity documents
- batch traceability
- the plan and numbering of the points
- the installation acceptance report
- the observations and deviations found
- measurements and photographs
- a test report, if testing was contracted
- acceptance documents.
The difference between the product documents and the installation documents is important.
A product can have the correct documentation and still be installed wrongly.
Likewise, an installation acceptance report does not replace the foundation design.
20. The most frequent installation mistakes
20. The most frequent installation mistakes
A fast installation is not necessarily a good installation.
Among the problems to avoid are:
- installing the whole grid before checking the first axes and diagonals
- choosing the length arbitrarily
- installing points without correlating them with the beams
- mistaking a stone for a good load-bearing layer
- forcibly correcting verticality at the end
- repositioning without checking the structure
- improvisations at flanges and adapters
- lack of photographs and measurements before the structure covers the foundation
- verbal acceptance of deviations without documentation.
At MARTETIC we prefer to stop and clarify a situation rather than repeat the same problem across the whole foundation.
What does a MARTETIC installation look like, in short?
The process can be summarised like this:
We determine the building, the grid, the products and the access conditions.
We mark the axes, the levels and the position of each point.
Access, utilities, obstacles and the machine's working space.
We monitor position, verticality, depth and the behaviour of the machine.
We check the levels, diagonals, positions and connections.
We record the products, observations and measurements and carry out testing when the project requires it.
Frequently asked questions about installing foundation screws
How long does it take to install a single screw?
The actual rotation may take only a few minutes. The real time per point, however, includes positioning the machine, alignment, verticality control, level measurement and any obstacles encountered.
Are foundation screws installed by hand?
For MARTETIC structural foundations, installation is mechanised with equipment compatible with the product. The machine must be able to provide the rotation, stability and control needed during installation.
Can screws be installed in ground containing stones?
Sometimes, yes. It depends on the size, distribution and depth of the obstacles. Repositioning or controlled pre-drilling can be used in certain situations. Large boulders, concrete or rock may require another solution.
Does the machine's pressure show the screw's capacity?
Not directly. Hydraulic pressure is a parameter of the installation system. It does not automatically represent torque, nor load-bearing capacity.
Does installation torque guarantee the load-bearing capacity?
Not on its own. Behaviour depends on the product, ground, depth, design and, when necessary, testing.
How straight must steel piles be installed?
Verticality and tolerances must be set in the design and in the work procedure. Control is done progressively, in two directions, during screwing.
Can screws be cut or welded on site?
Not as a normal adjustment method. Such interventions must have an approved detail and procedure, including for restoring the corrosion protection.
Can the building be placed immediately after installation?
In general, yes, after the foundation has been checked and accepted. There is no curing period as with concrete, but that does not mean acceptance can be skipped.
Do all screws have to be tested?
Not automatically. The number and type of tests are determined according to the project, the importance of the building, the ground and the control programme.
How deep should ground screws be?
The depth is not chosen only by the length of the product. It depends on the ground (the layer in which the screw must work), the loads and the structure. With a one-piece screw from the M range the flange is fixed, so the depth at which screwing stops directly affects the final level of the support. With the V systems, extensions give greater depth flexibility, but each joint must be installed and checked.
Conclusion: installation is not just screwing in
The main visible advantage of the screw foundation is speed.
But the performance of the foundation does not come from how fast the machine rotates.
The most important decisions are actually made before installation starts.
We must know where the points are, what they support, what ground we have and what equipment is suitable.
On site we check whether reality confirms what we prepared.
And if the situation differs, we do not improvise. We check and adapt the solution.
Do you have a screw foundation project?
Send us the plan or the dimensions of the building, the locality, photographs of the site and the geotechnical study, if there is one.
MARTETIC can analyse the support grid, the suitable products, machine access and the conditions needed for installation before quoting.
Send the project for analysis